
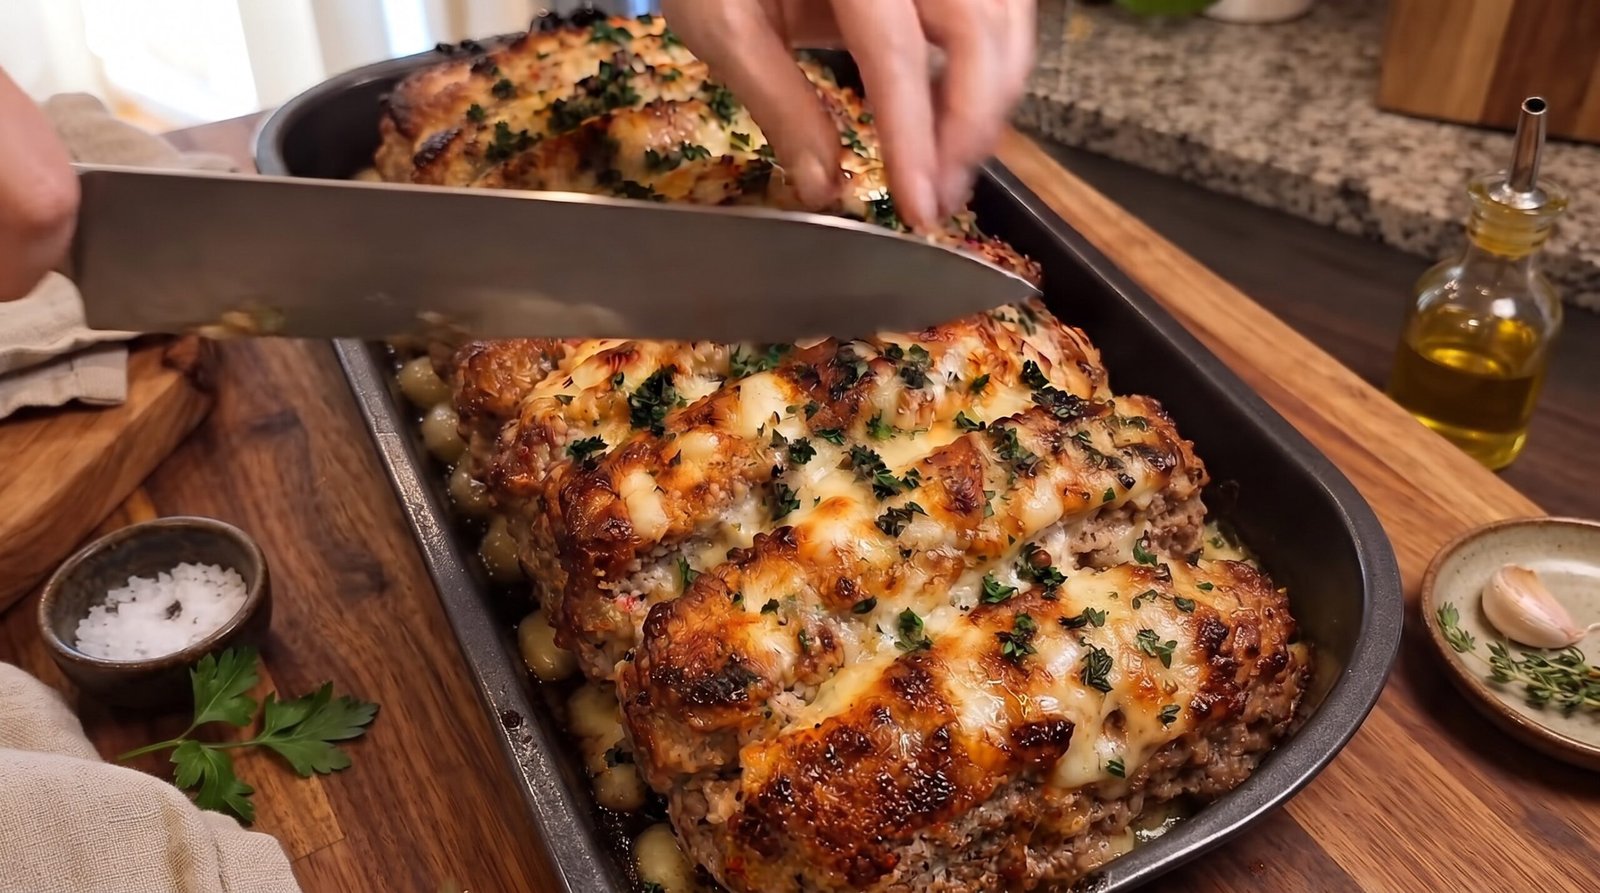
I used to think meatloaf was just a dry, sad block of beef that required a heavy coating of sugary glaze to be edible. My kitchen habits changed when I started looking at the loaf as a canvas for savory, melted goodness rather than a leftover-filling chore. This Italian-style meatloaf recipe relies on a mix of beef and pork for moisture, plenty of herbs for fragrance, and a generous layer of mozzarella that browns in the heat of the oven. It is the kind of dinner that fills the house with a comforting scent and actually stays juicy after you pull it out of the oven.
If you are tired of meatloaf that crumbles the moment you try to slice it or tastes bland, you are in the right place. I spent many weeknights testing ratios to find the balance between structural integrity and a tender crumb. By keeping the filler simple and focusing on high-quality aromatics, you get a reliable meal that feels like something you would order at a casual neighborhood bistro. This dish works well for busy evenings because the prep is straightforward and the oven does all the heavy work while you attend to side dishes like a simple green salad or roasted garlic potatoes.
Why This Recipe Works
This approach works because it honors the texture of the meat. Many recipes call for too many breadcrumbs or milk-soaked binders, which can make the loaf feel dense or mushy. Here, I use just enough panko and parmesan to help hold the shape while allowing the fats from the ground beef and pork to distribute evenly throughout the center. The addition of pork is vital because beef alone can lean toward dryness once it hits the internal temperature required for safety. The pork adds a richness that balances the texture and keeps every bite tender.
Flavor-wise, this is all about the Italian aromatics. Fresh garlic, dried oregano, and a touch of parsley create a profile that feels familiar and comforting without being overwhelming. The cheese element is not just an afterthought; it is baked right on top, creating a crust that protects the top of the loaf from drying out. This browning effect, which we call the Maillard reaction in professional kitchens, adds a savory depth that simple boiled or steamed meat lacks. Because you are not masking the flavor with a thick, syrupy ketchup glaze, you can actually taste the quality of the ingredients you choose.
Finally, the cooking process is reliable. By baking at a moderate temperature of 375 degrees Fahrenheit, you allow the heat to penetrate the center of the loaf without scorching the exterior. This creates a uniform cook where the middle reaches a safe internal temperature at roughly the same time the cheese develops those golden, toasted spots. It is a forgiving recipe that rarely fails as long as you use a digital thermometer to check for doneness. You get a consistent result that slices beautifully, making it easy to serve for a weeknight dinner or even a simple weekend gathering.
Ingredient Notes
The Protein Blend
I always use a mix of 80/20 ground beef and ground pork. The 80/20 ratio for the beef is important because that fat is necessary for flavor and moisture. Using lean ground beef often results in a loaf that feels chalky on the tongue. The ground pork provides a softer, more delicate texture that prevents the beef from feeling like a solid brick. You can buy these pre-mixed at some butcher shops, but buying them separately allows you to control the ratio if you prefer a bit more pork for extra tenderness.
The Binder and Moisture
Panko breadcrumbs are my go-to choice because they are lighter and airier than standard breadcrumbs. They absorb just enough liquid to keep the loaf moist without turning into a paste. I mix these with a little bit of whole milk. The milk helps soften the crumbs before they meet the meat, ensuring that you do not get hard, crunchy bits of bread in your finished slice. You can use full-fat milk or half-and-half, but I avoid skim milk as it lacks the body needed to keep the structure together.
Aromatics and Flavor
Fresh garlic is non-negotiable here. I find that jarred or powdered garlic simply does not provide the same depth. I finely mince the cloves so they distribute evenly and do not create large, spicy bites. For the herbs, I prefer a combination of dried oregano and fresh parsley. Dried herbs are more potent, so they hold their own during the long bake time, whereas fresh herbs on top provide a bright, clean finish. I also add a generous amount of grated parmesan cheese directly into the meat mixture for a salty, umami kick that goes beyond just adding salt.
| Ingredient | Amount | Notes |
|---|---|---|
| Ground Beef (80/20) | 1 pound | Fresh, cold from the fridge |
| Ground Pork | 1 pound | Adds essential fat and flavor |
| Panko Breadcrumbs | 1 cup | Keeps the loaf light |
| Whole Milk | 1/2 cup | Softens the breadcrumbs |
| Parmesan Cheese | 1/2 cup | Grated finely |
| Garlic | 3 cloves | Minced very fine |
| Dried Oregano | 1 tablespoon | Rubbed between fingers |
| Fresh Parsley | 1/4 cup | Chopped roughly |
| Salt | 1 teaspoon | Fine sea salt |
| Black Pepper | 1/2 teaspoon | Freshly cracked |
| Large Egg | 1 | Acts as the main structural glue |
| Mozzarella Cheese | 1.5 cups | Shredded low-moisture |
The Recipe
- Prep Time: 15 minutes
- Cook Time: 50 to 55 minutes
- Total Time: 1 hour 10 minutes
- Servings: 6 to 8
- Difficulty: Easy
Equipment needed: Large mixing bowl, rimmed baking sheet, parchment paper or silicone mat, digital meat thermometer, chef's knife, cutting board.
Step-by-Step Instructions
Step 1: Prep the Ingredients
Start by preheating your oven to 375 degrees Fahrenheit. Set your baking sheet aside and line it with a piece of parchment paper. This makes cleanup significantly easier and prevents the bottom of the meatloaf from sticking to the pan. Take your garlic and peel it, then use a sharp knife to mince it as finely as possible. Chop your fresh parsley, discarding any thick stems.
Step 2: Combine the Base
In a large mixing bowl, combine the panko breadcrumbs and the milk. Let this mixture sit for about 5 minutes. This is a crucial step that ensures the breadcrumbs are fully hydrated before they touch the meat. Once they have absorbed the milk, add the egg, minced garlic, oregano, parsley, parmesan, salt, and black pepper. Whisk this mixture together with a fork until it is uniform in texture.
Step 3: Mix in the Meat
Add the ground beef and ground pork to the bowl with your wet mixture. Use your hands to gently fold everything together. Avoid overworking the meat, as kneading it too much will result in a dense, tough loaf. Mix just until the ingredients are distributed evenly throughout. You will feel when the meat, fat, and crumbs have come together into a cohesive, soft mass that holds its shape.
Step 4: Shape and Bake
Turn the meat mixture onto your prepared baking sheet. Using your hands, shape it into an oval loaf that is about 3 inches thick. Aim for an even thickness so it bakes consistently from end to end. Place the tray into the center rack of your preheated oven. Bake for 40 minutes at 375 degrees. At this point, the meat will be firm but not yet finished.
Step 5: Add the Cheese
After the 40 minutes, carefully remove the tray from the oven. Evenly sprinkle the shredded mozzarella cheese over the top of the loaf. Use a spoon to gently press the cheese into the surface if it seems to be sliding off the sides. Return the tray to the oven for another 10 to 15 minutes. You are looking for the cheese to be completely melted, bubbly, and showing signs of golden brown spots.
Step 6: Rest and Serve
Use your digital meat thermometer to ensure the internal temperature has reached at least 160 degrees Fahrenheit. This is the safe zone for ground meat. Remove the pan from the oven and let the loaf rest for 10 minutes before slicing. This rest period is vital; it allows the juices to redistribute throughout the meat, ensuring that your slices remain intact and moist when you serve them.
Mistakes I Made (So You Don't Have To)
Overworking the Mixture
Early in my cooking days, I used to treat the meatloaf mixture like bread dough, kneading it until it was completely smooth. This created a dense, rubbery texture that was quite unappealing. The fix is simple: use your fingers to gently toss the ingredients together. Stop as soon as you stop seeing streaks of egg or spices. The meat should still look slightly loose, not like a tight, uniform paste.
Skipping the Rest Time
I used to be so hungry that I would slice into the loaf the second it came out of the oven. Every time I did this, the loaf would crumble and fall apart on the plate. It needs that 10-minute rest. During this time, the internal fibers relax and the liquid settles. If you slice it too early, you lose all the juices and the structure collapses. Patience here makes a big difference in presentation.
Using the Wrong Heat
I once tried to bake my meatloaf at a lower temperature of 325 degrees, thinking it would keep it tender. Instead, the meat ended up cooking for so long that the moisture evaporated, resulting in a dry, lackluster dish. Stick to 375 degrees. It is high enough to develop a nice exterior texture while keeping the center juicy. The thermometer is your best friend; do not guess if it is finished, just measure the internal temperature.
Neglecting the Bottom Surface
I used to put the meat directly on a bare metal pan without parchment paper. The bottom would become hard and difficult to remove without tearing the loaf. Using parchment paper or a silicone baking mat solves this completely. It creates a small barrier that keeps the bottom from over-browning while allowing the heat to circulate properly. It makes serving much easier and saves you from scrubbing the pan later.
Variations and Tips
Add Some Heat
If you enjoy a bit of spice, add a tablespoon of red pepper flakes into the meat mixture at the same time you add the herbs. You can also mix in some chopped pickled jalapeños if you want a tangy, spicy contrast to the rich cheese topping. Just ensure you drain any excess liquid from the peppers before adding them to avoid making the loaf too wet.
Make-Ahead Strategy
This recipe is perfect for preparing in advance. You can mix the meat, shape it into the loaf, and place it on the baking sheet early in the day. Cover it tightly with plastic wrap and keep it in the refrigerator until you are ready to bake. Do not let it sit out at room temperature for more than 30 minutes before putting it in the oven. When you are ready, just remove the plastic and bake as directed, perhaps adding 5 extra minutes if it started from a very cold state.
Cheese Customization
While mozzarella provides that classic pull and melt, you can experiment with other cheeses. Provolone works well and adds a sharper flavor profile. You can also mix in a small amount of finely grated fontina if you want a creamier, more luxurious finish on top. Avoid using very hard cheeses like aged parmesan as a topping, as they won't melt the same way and might become too tough under the oven heat.
A Fresh Herb Finish
After you pull the loaf out of the oven, consider sprinkling some fresh, finely chopped basil over the melted cheese. The heat from the cheese will release the oils in the basil, adding a burst of freshness that cuts through the fat of the meat. This makes the dish look much more vibrant and adds a professional touch without any extra effort or cooking time.
Storage and Reheating
If you have leftovers, allow the meatloaf to cool completely on the counter before putting it away. Do not leave it out for more than 2 hours. Store it in an airtight container in the refrigerator for up to 3 days. When you want to reheat a slice, I recommend using a skillet with a tiny splash of water and a lid. This allows the meat to steam and warm through without turning into leather. You can also use a microwave at 50 percent power for 90 seconds, but be careful not to overcook it or the center will become tough. I do not recommend freezing this finished dish, as the moisture from the cheese and the fat in the meat tends to change the texture upon thawing, making it somewhat grainy.
Frequently Asked Questions
Can I use turkey instead of beef and pork?
Yes, you can swap in ground turkey, but it will be much leaner. To compensate, I suggest adding a little extra olive oil or even a tablespoon of finely grated onion to help keep it from drying out. Keep in mind that turkey needs to reach a safe internal temperature of 165 degrees Fahrenheit, so you will need to keep a close eye on your meat thermometer while it bakes.
Why does my meatloaf fall apart when I try to move it?
This usually happens because the meat was overworked or the loaf did not rest long enough. Make sure you use a binder like the egg and breadcrumbs mentioned, and do not skip the 10-minute resting period on the counter after taking it out of the oven. A wide spatula is also helpful when moving the loaf from the tray to a cutting board.
Can I prepare this in a loaf pan?
You can use a standard loaf pan, but I find that it traps steam and prevents the outside from browning nicely. If you must use a pan, make sure it is not too deep, or the middle will take much longer to cook than the edges. Baking it free-form on a flat tray generally leads to more even browning and a better final texture.
Should I cover the meatloaf with foil?
I generally avoid covering it with foil because I want the cheese on top to brown and develop those delicious crusty edges. If you notice the edges are browning too quickly before the center is done, you can tent a piece of foil loosely over the top, but try to avoid sealing it tight so you don't steam the meat.
Is it safe to reheat this more than once?
I strongly advise against reheating leftovers more than once. Every time you heat and cool meat, it loses moisture and increases the risk of bacteria growth. Just take out the specific portion you plan to eat, warm that up until it is steaming hot, and leave the rest safely chilled in the refrigerator until your next meal.
Final Thoughts
Making a good Italian-style meatloaf is all about treating the ingredients with respect and not over-complicating the process. Once you get the hang of the meat-to-binder ratio, you will find that this dish becomes one of the most reliable tools in your kitchen. It is humble, filling, and always seems to satisfy everyone at the table.
Do not worry if your first loaf does not look exactly like the ones in magazines. The most important thing is the flavor and the texture. As long as you keep your thermometer handy and let the meat rest, you are going to have a dinner that tastes great every single time you pull it out of the oven.