
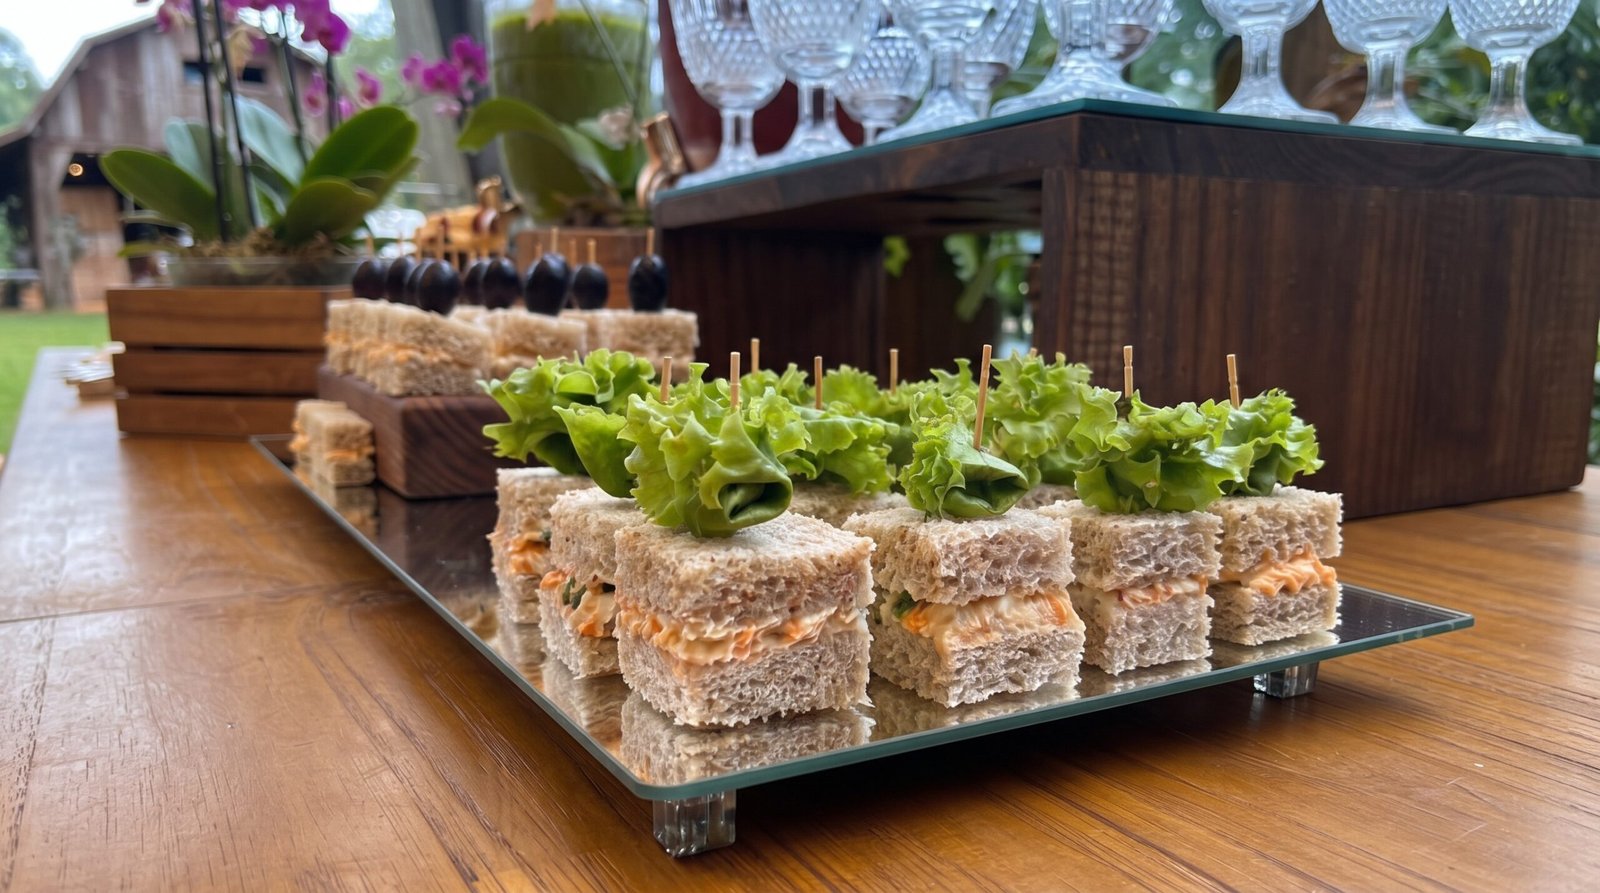
There is something special about sitting down with a group of friends for an afternoon gathering, especially when there are small, bite-sized snacks on the table. Tea sandwiches are a staple for these moments, but they often feel like they belong only in fancy tearooms. I used to think that making these dainty little squares required professional training or hours of tedious work in the kitchen. I have learned over time that the secret is just in the assembly, a bit of patience, and knowing exactly how to handle the bread and fillings to get that clean, sharp look that makes them so attractive. Whether you are hosting a bridal shower, a birthday, or just want to treat your family on a slow Sunday, these sandwiches hit the spot without needing any complex equipment. They are light, easy to hold, and allow everyone to try different flavors without getting too full before the main event. In this guide, I will share the process I use to turn basic pantry items into a spread that looks like it came from a high-end caterer.
Why This Recipe Works
The primary reason this recipe succeeds is the contrast between the textures. You have the soft, pillowy white bread that provides a neutral base, paired with a savory, creamy filling that brings all the flavor. By removing the crusts, the sandwich becomes a delicate bite that highlights the filling rather than the bread. The inclusion of fresh, crisp lettuce adds a bright crunch that prevents the sandwich from feeling too heavy or monotonous. Another reason these work well is that the components are stable. Because the filling is creamy and acts as a glue, the layers stay together when you cut them into small squares. Many finger foods fall apart or get soggy, but if you prepare these with the right moisture levels, they stay fresh for several hours. The ratio of filling to bread is also key. I aim for enough filling to make each bite satisfying without making the sandwich slide apart. These sandwiches are also quite forgiving. If you have a favorite herb, a specific type of cheese, or a leftover rotisserie chicken, you can customize the filling. They look consistent and neat, which is why people often assume they are difficult to make, but the effort is quite low once you establish a rhythm. It is a reliable, crowd-pleasing approach that feels elevated because of the presentation.
Ingredient Notes
The Bread
When picking bread for these small bites, I always choose a standard, soft white sandwich bread. Avoid sourdough or bread with large holes, as the filling will leak out. You want a slice that is uniform and has a fine crumb. Store-bought white bread works best because it is consistent in thickness and softness, which is exactly what you need for that classic, uniform look. If you prefer wheat bread, ensure it is the soft variety, not the hearty, grainy kind that can overwhelm the delicate filling.
The Savory Filling
For the filling, I typically use a base of finely shredded cooked chicken mixed with a good quality mayonnaise. The chicken should be cooked until it is tender but not stringy. You can boil it or use a store-bought rotisserie bird. For the seasoning, I rely on a mix of finely minced fresh parsley, a touch of salt, a pinch of black pepper, and perhaps a tiny bit of grated onion for depth. The texture of the filling should be spreadable but firm enough that it does not squeeze out when you bite into the sandwich. If you find the mixture too dry, add a small spoonful of plain yogurt or extra mayonnaise.
The Greens
The lettuce is not just for decoration here. I look for leaves that have a bit of texture and are naturally small or can be torn into manageable pieces. Green leaf lettuce or butter lettuce works well because they are pliable. Do not use iceberg lettuce, as it is too watery and will make your bread soggy very quickly. Make sure the lettuce is thoroughly dried after washing. I use a salad spinner or a clean kitchen towel to remove every drop of moisture. If the lettuce is wet, the bread will turn into a mushy mess within minutes.
The Extras
To keep things simple but interesting, I sometimes add a layer of very thinly sliced cucumber or even a bit of grated carrot for color. These additions provide a little more crunch. You can also incorporate chopped herbs like chives or dill into the chicken salad base to give it a fresh, garden-like scent.
| Ingredient | Amount | Notes |
|---|---|---|
| White sandwich bread | 12 slices | Fresh and soft |
| Cooked chicken breast | 2 cups | Finely shredded |
| Mayonnaise | 1/2 cup | Full fat for best taste |
| Fresh parsley | 2 tablespoons | Finely chopped |
| Salt | 1/2 teaspoon | Adjust to taste |
| Black pepper | 1/4 teaspoon | Freshly cracked |
| Butter lettuce | 6 leaves | Cleaned and dried |
| Chives | 1 tablespoon | Finely minced |
The Recipe
- Prep Time: 30 minutes
- Cook Time: 0 minutes
- Total Time: 30 minutes
- Servings: 24 small squares
- Difficulty: Simple
Equipment Needed:
– Sharp serrated bread knife
– Mixing bowl
– Spatula or butter knife
– Large cutting board
– Damp kitchen towel
Step-by-Step Instructions
Step 1: Prepare the Savory Filling
Start by taking your shredded chicken and placing it in a medium mixing bowl. It is important that the chicken is shredded into very small pieces; if the pieces are too large, the sandwich will not stack well or cut cleanly. Add the mayonnaise, chopped parsley, salt, black pepper, and chives. Using a sturdy spatula, fold the ingredients together until the chicken is evenly coated and the mixture holds together. Give it a taste to check the seasoning; you want it to be well-balanced but not overly salty, as the bread will soak up some of that flavor.
Step 2: Prepare the Bread
Lay your slices of white bread out on a clean, flat surface. Using your serrated knife, carefully trim the crusts off each slice. I find it easiest to do this one by one or in small stacks of two if your knife is sharp enough. Make sure you are cutting as close to the edge as possible to maximize the usable surface area. Once the crusts are removed, you should have perfect squares. If your bread is very soft, do not press down too hard while cutting, as you do not want to flatten the crumb.
Step 3: Assemble the Foundation
Take half of the bread squares and spread a generous, even layer of the chicken filling across the entire surface of each slice. I usually go right up to the edges but not over them. The thickness of the filling layer should be roughly a quarter-inch. If the layer is too thin, the sandwich will taste like just bread; if it is too thick, the sandwich will not be stable. Smooth the top of the filling with your butter knife so it is level.
Step 4: Add the Greens and Close
Place a piece of the prepared lettuce over the filling layer on each sandwich. The lettuce should cover the surface of the filling completely but not hang over the edges, as that will make it difficult to get clean edges when you cut the final squares. If the lettuce leaf is too large, tear it to fit the dimensions of your bread slice. Take the remaining slices of bread and place them on top of the lettuce to form a closed sandwich. Gently press down on each sandwich with the palm of your hand to ensure the layers are held together by the creamy filling.
Step 5: Cut and Serve
Using your serrated knife, cut each sandwich into four smaller squares. I do this by cutting once vertically through the center, then once horizontally through the center. Wipe your knife with a damp cloth between every few cuts to ensure that crumbs from the bread do not get trapped in the filling of the next cut. This keeps the sandwiches looking crisp and professional. Place a small toothpick in the center of each square to hold the layers together and make them easy for guests to pick up. Arrange them on a serving platter immediately.
Mistakes I Made (So You Don't Have To)
Overstuffing the Sandwiches
Early on, I used to put as much filling as possible into each sandwich. While this tasted good, it was a disaster when it came time to cut them. The filling would squish out the sides, making the edges messy and the sandwiches unstable. The fix is simple: use a measured amount of filling and spread it in a uniform, thin layer. You want the filling to act as a binder, not a primary component that causes the sandwich to slide apart.
Leaving the Crusts On
I once tried to leave the crusts on to save time and reduce waste, but it resulted in a very uneven appearance. The crusts are tougher and don't absorb the flavors or soften like the center of the bread. It also made the sandwiches look rustic rather than refined. The solution is to spend the extra few minutes trimming the edges carefully. It completely changes the experience of eating the sandwich.
Using Wet Lettuce
One time, I washed the lettuce and didn't dry it enough, thinking the moisture would help keep the sandwiches fresh. Instead, the water seeped into the bread within twenty minutes, leaving me with a soggy, unappealing meal. Now, I always use a salad spinner and then pat the leaves dry with paper towels. I also assemble the sandwiches as close to serving time as possible to keep the bread soft but not wet.
Dull Knife Usage
I used to use a regular kitchen knife to cut the sandwiches, which only crushed the bread and pulled the filling out. It ruined the clean, sharp corners. Investing in a long, serrated bread knife was the fix. The teeth of the blade do the work without needing to press down hard, allowing the sandwich to remain fluffy and tall after being cut. Always wipe the blade clean to avoid cross-contamination of crumbs.
Variations and Tips
Flavor Swaps
If you want to change the flavor profile, you can swap the chicken for finely chopped hard-boiled eggs for a classic egg salad version. You can also mix in some finely diced celery for extra crunch. Just make sure whatever you add is diced very small so the sandwiches stay level when stacked.
Make-Ahead Strategy
You can prepare the chicken filling a day in advance and keep it in the refrigerator in an airtight container. However, do not assemble the sandwiches until an hour before serving. Storing fully assembled sandwiches in the fridge often dries out the bread or makes it soggy. Keep your bread sealed in its original bag until you are ready to assemble.
Bread Selection
For a more colorful look, you can use alternating layers of white and whole wheat bread. This creates a checkerboard effect when you stack or cut the sandwiches. If you do this, ensure the thicknesses are similar so the sandwich doesn't become lopsided.
Herb Infusions
Experiment with different herbs in your filling. Dill works wonderfully with chicken, and tarragon provides a slightly sophisticated, anise-like flavor. Just be careful not to over-season; keep the base flavor simple so the herbs act as an accent rather than the main feature.
Storage and Reheating
If you happen to have leftovers, they need to be handled carefully. Because this dish contains mayonnaise and chicken, it should not sit out at room temperature for more than two hours. If you are serving these at an event, keep them in a cool area and replenish the platter as needed. Store any leftovers in an airtight container in the refrigerator. They will stay fresh for up to two days, but the bread will inevitably lose its initial freshness and texture over time. I do not recommend freezing these sandwiches, as the bread will become mushy and the mayonnaise-based filling will separate when thawed. These are best enjoyed fresh on the day they are made.
Frequently Asked Questions
Can I use store-bought rotisserie chicken?
Yes, using a rotisserie chicken is a great time-saving trick. Just ensure you remove all the skin and bones before shredding. Shredding the meat while it is still slightly warm makes it easier to work with, but wait for it to cool down before mixing it with the mayonnaise to ensure the filling stays stable.
How do I prevent the bread from drying out?
To keep the bread soft, keep it in the original packaging until the very last second. If you have to assemble them a little early, cover the finished tray with a slightly damp paper towel, but be careful not to let the towel touch the bread directly, or it might leave damp spots.
What is the best way to keep the sandwiches together?
The secret to holding them together is the toothpick. After you cut the squares, insert a toothpick through the center of each one. It keeps the bread and lettuce in place and makes them much easier for guests to handle without dropping anything.
Can I make these for a larger crowd?
These are perfect for large groups because they are so easy to batch-process. Just use a larger mixing bowl for the filling and set up an assembly station. If you have a friend helping, one person can spread the filling and add the lettuce, while the other does the cutting.
Should I toast the bread?
I advise against toasting the bread for this specific style of sandwich. You want the soft, pillowy texture that contrasts with the crunch of the lettuce. Toasting the bread makes it brittle, which causes it to crack when you try to cut it into small, clean squares.
Final Thoughts
Making these sandwiches has become one of my favorite ways to spend time in the kitchen. There is a quiet satisfaction in organizing the layers and seeing the finished product come together on a platter. It is not about doing anything overly complicated or using expensive ingredients; it is about paying attention to the small details like fresh ingredients, clean cuts, and the right ratios.
I hope this helps you feel confident the next time you are hosting friends or family. These sandwiches are a small but thoughtful touch that always makes people feel welcome. Take your time with the assembly, have a sharp knife ready, and enjoy the process. It really is the best way to start a nice afternoon.