
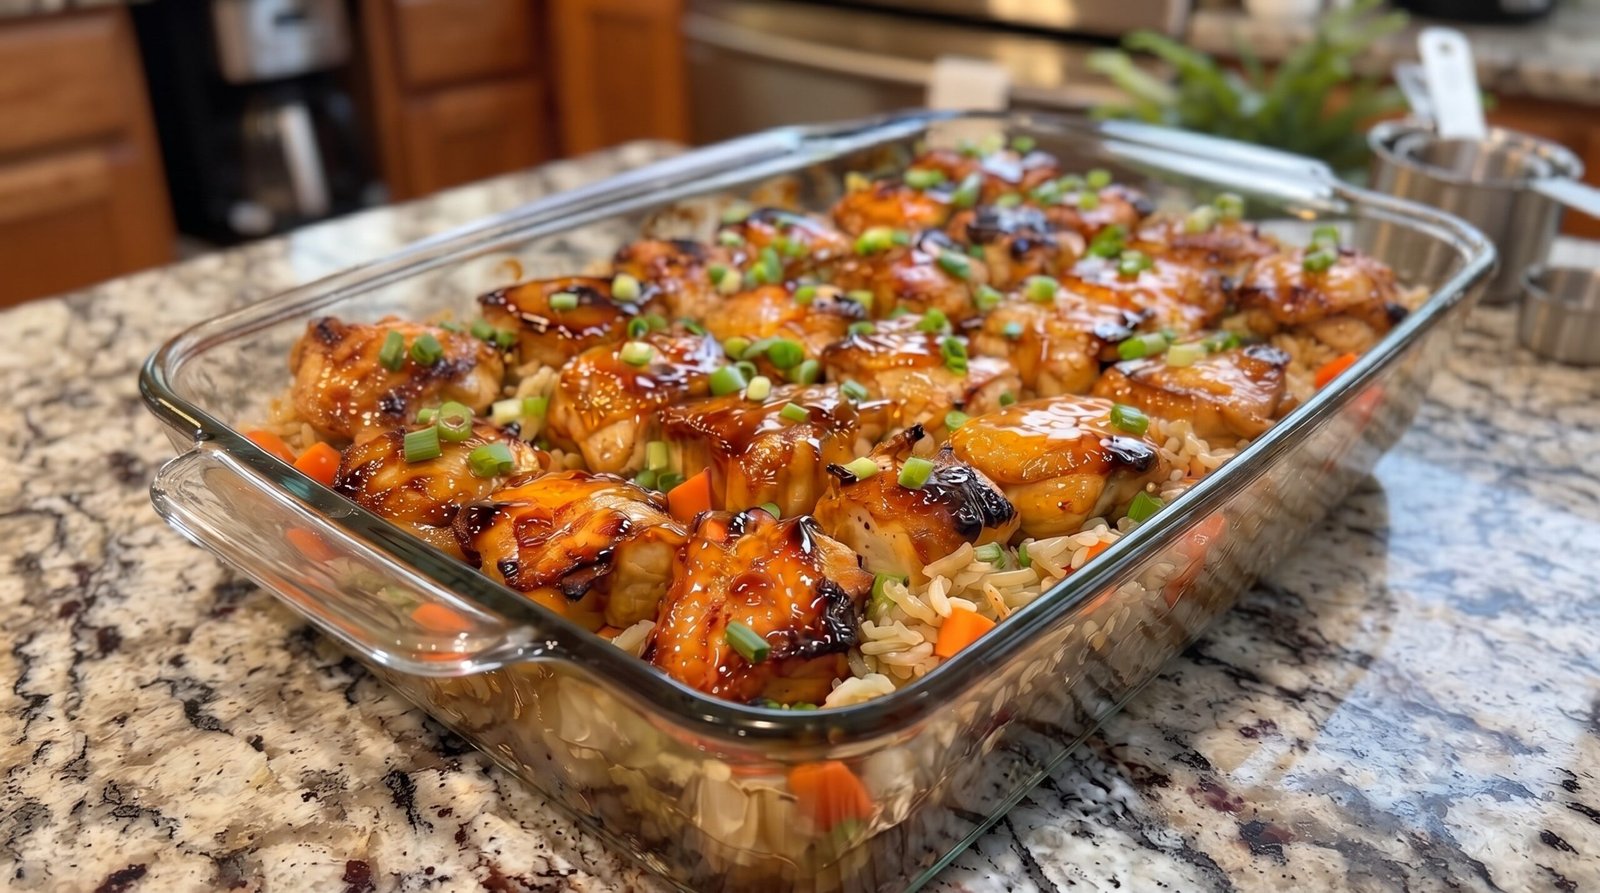
I often find myself standing in my kitchen at five in the evening, staring at a package of chicken thighs and a bag of rice, wondering how to turn them into something that feels like a real dinner without spending all night at the stove. Most nights, I do not have the energy to stand over a frying pan, flipping individual pieces of meat and worrying about rice sticking to the bottom of the pot. This baked teriyaki chicken and rice casserole has become my standard answer for those busy weeknights. It is one of those meals that does the work for you once it goes into the oven, leaving you free to catch up on chores or just sit down for a moment while the kitchen smells like ginger and soy sauce.
When I first started making this, I struggled with the balance of moisture in the rice versus the tenderness of the chicken. I learned that by controlling the liquid ratio carefully, you can get fluffy rice and tender meat at the same time. The sauce thickens as it bubbles, coating everything in a savory glaze. It is simple, consistent, and satisfying, making it a reliable meal to keep in your regular rotation for when you want something hearty that comes together with minimal fuss.
Why This Recipe Works
This recipe relies on the oven to do the heavy lifting, which allows the rice to absorb the flavors of the teriyaki sauce while the chicken cooks on top. By using chicken thighs, you ensure the meat stays moist throughout the baking process. Chicken breasts tend to dry out quickly in the oven, but the higher fat content in thighs helps them handle the heat, resulting in a tender texture that pairs well with the steamed rice. The key to this success is the liquid ratio. Using a specific amount of chicken broth and teriyaki sauce keeps the rice from becoming too dry or turning into mush.
Another reason this dish works is the convenience of a one-dish meal. Since the vegetables, rice, and protein all cook together in one baking dish, you do not have to worry about cleaning multiple pots and pans after dinner. This is a massive time-saver when you are trying to minimize the amount of cleanup. The flavors develop deeply as the sauce concentrates in the oven, creating a rich taste that is hard to achieve with quick stovetop methods.
The texture contrast is another highlight. The rice underneath becomes soft and seasoned, while the tops of the chicken pieces take on a nice color from the sugars in the teriyaki sauce. Adding fresh green onions right before serving provides a burst of freshness and a mild crunch that brightens up the heavier, savory notes of the soy sauce and ginger. It is an honest meal that focuses on balance rather than complicated techniques, making it approachable for anyone who wants a solid dinner without needing professional culinary skills.
Ingredient Notes
The Protein
I always use boneless, skinless chicken thighs for this. They are forgiving and stay juicy even after forty minutes in the oven. If you prefer white meat, you can use breasts, but you must be careful not to overcook them. If you swap to breasts, keep the pieces uniform in size so they finish at the same time as the rice.
The Rice
Long-grain white rice is the best choice here. Jasmine or standard long-grain rice works well because it holds its structure without turning into a sticky clump. Do not use instant rice or minute rice for this, as they will turn into porridge before the chicken is fully cooked. Always rinse the rice under cold water in a fine-mesh strainer until the water runs clear; this removes excess starch and prevents the casserole from becoming gummy.
The Sauce
The base is a store-bought teriyaki sauce, but I often doctor it up with a little fresh grated ginger and garlic. If your sauce is very thick, you might need to add a splash more broth so the rice has enough liquid to steam. Always check the labels on your sauce if you have specific dietary needs, as some contain wheat or other common allergens.
Vegetables
Carrots and broccoli florets are my go-to additions. Carrots take a while to soften, so I chop them into small, even pieces. Broccoli should be cut into bite-sized florets. I add these to the dish during the final stages or tuck them into the rice at the start if they are cut into sturdy, thick chunks that can withstand the full baking time without turning into mush.
| Ingredient | Amount | Notes |
|---|---|---|
| Boneless skinless chicken thighs | 1.5 pounds | Cut into bite-sized pieces |
| Long-grain white rice | 2 cups | Rinsed until water runs clear |
| Chicken broth | 3 cups | Low sodium works best |
| Teriyaki sauce | 1 cup | Plus extra for drizzling |
| Carrots | 2 large | Peeled and sliced into thin rounds |
| Broccoli florets | 2 cups | Cut into small pieces |
| Garlic | 3 cloves | Minced finely |
| Fresh ginger | 1 teaspoon | Grated or finely minced |
| Green onions | 1/2 bunch | Sliced thinly for garnish |
| Vegetable oil | 1 tablespoon | For greasing the pan |
The Recipe
- Prep time: 15 minutes
- Cook time: 45 minutes
- Total time: 1 hour
- Servings: 4 to 6
- Difficulty: Easy
Equipment needed:
– 9×13 inch glass baking dish
– Fine-mesh strainer
– Aluminum foil
– Whisk
– Mixing bowl
– Meat thermometer
Step 1: Prep the Ingredients
Start by rinsing your rice in a fine-mesh strainer under cold running water. Keep rinsing and stirring the grains with your hand until the water flowing out is clear rather than cloudy. Drain it well. Preheat your oven to 375 degrees Fahrenheit. While the oven heats up, use a sharp knife to cut your chicken thighs into consistent, one-inch pieces. This size ensures the chicken cooks through at the same rate as the rice.
Step 2: Assemble the Base
Grease your 9×13 inch glass baking dish with a small amount of vegetable oil to prevent sticking. Spread the rinsed rice evenly across the bottom of the dish. Scatter your sliced carrots and broccoli florets over the rice. You want these distributed so that every scoop of the final dish has a bit of vegetable in it.
Step 3: Mix the Liquid
In a medium bowl, whisk together the three cups of chicken broth, one cup of teriyaki sauce, the minced garlic, and the grated ginger. This mixture provides the hydration for the rice and the seasoning for everything else. Because the teriyaki sauce usually contains sugar, whisking it well with the broth helps it distribute evenly so you do not have hot spots of intense flavor.
Step 4: Add the Chicken and Bake
Place the raw chicken pieces on top of the rice and vegetable layer. Try to keep them in a single layer so they cook evenly. Pour the liquid mixture over the entire dish, ensuring all the rice is submerged. Cover the baking dish tightly with aluminum foil. This step is crucial; the foil traps the steam, which is the only way the rice will cook through properly. Place the dish in the center rack of the oven and bake for 35 minutes.
Step 5: Final Cooking and Browning
After 35 minutes, remove the foil. The rice should have absorbed most of the liquid. Check the chicken with a meat thermometer; it should register an internal temperature of 165 degrees Fahrenheit. If it is cooked through, you can leave it uncovered for an additional 10 minutes to allow the top of the chicken to darken slightly and the sauce to thicken into a glaze. If the rice still looks too liquid, leave the foil off and continue baking until the moisture is gone.
Step 6: Serve
Once the internal temperature reaches 165 degrees Fahrenheit and the liquid is absorbed, remove the dish from the oven. Let it rest for five minutes. This rest period allows the starch in the rice to settle, making it easier to serve. Sprinkle the sliced green onions over the top before bringing the dish to the table.
Mistakes I Made (So You Don't Have To)
Using the Wrong Rice
Early on, I tried using brown rice, thinking it would be a healthier swap. It ended up being hard and crunchy even after 50 minutes in the oven because brown rice requires much more water and a longer cooking time than white rice. Stick to standard long-grain white rice for this specific recipe to get the right texture.
Forgetting to Rinse the Rice
I once skipped the rinsing step because I was in a rush. The dish came out gummy and thick because the extra surface starch turned into a paste. Rinsing takes less than two minutes and it makes a world of difference in the final texture of the rice, keeping the grains separate rather than clumpy.
Not Sealing the Foil Properly
I once had a leak in the foil, which caused the steam to escape from one corner of the dish. The rice in that corner remained hard and undercooked while the rest of the pan was fine. Make sure to press the foil down tightly around all the edges of the glass dish to create a good seal.
Overcrowding the Dish
I once tried to double the recipe in the same 9×13 dish, thinking it would fit if I piled the chicken high. The center took way too long to cook, and the edges became overcooked and dry. Stick to the suggested amounts so the heat can circulate and reach the center of the rice bed consistently.
Variations and Tips
Vegetable Swaps
If you do not have carrots or broccoli, you can use snap peas or sliced bell peppers. Add these at the very beginning just like the carrots, or if you prefer a slight snap to your vegetables, stir them in during the final 10 minutes of baking. Just remember to cut vegetables into pieces that will cook at the same rate.
Boosting the Flavor
If you like heat, stir a teaspoon of chili paste or some red pepper flakes into the liquid mixture before pouring it over the rice. This adds a nice background warmth that cuts through the sweetness of the teriyaki sauce. You can also garnish the final dish with toasted sesame seeds for a bit of extra nuttiness.
Make-Ahead Strategy
You can prep the liquid mixture and chop the chicken and vegetables ahead of time. Keep them in separate containers in the refrigerator. When you are ready to cook, just assemble the layers in the baking dish. Do not combine the liquid with the rice more than a few minutes before baking, or the rice will start to soak up the liquid prematurely and soften too much.
Oven-Safe Dishware
Using a glass baking dish is ideal because you can see if the rice is still swimming in liquid at the bottom. Metal pans heat up faster and can sometimes burn the bottom layer of rice before the chicken is fully cooked. If you must use a metal pan, check the dish five minutes earlier than suggested to ensure the bottom isn't scorching.
Storage and Reheating
If you have leftovers, let the dish cool to room temperature, but do not leave it sitting on the counter for more than two hours. Transfer the food into an airtight container and store it in the refrigerator. It will stay good for up to three days. I find that the flavors actually meld even better on the second day.
When you are ready to eat the leftovers, the best way to reheat it is in the microwave. Add a tiny splash of water or broth to the container before heating it, as the rice will have continued to absorb moisture while sitting in the fridge. Heat it until it is steaming hot throughout, aiming for an internal temperature of 165 degrees Fahrenheit. It does not freeze well, as the texture of the rice tends to break down and become mushy after being thawed. It is best enjoyed fresh or within that three-day refrigerator window.
Frequently Asked Questions
Can I use chicken breasts instead of thighs?
Yes, you can use chicken breasts, but keep in mind that they are leaner and can dry out if overcooked. Cut the breasts into slightly larger, uniform chunks so they retain moisture better. Start checking the temperature at the 35-minute mark, and as soon as they hit 165 degrees Fahrenheit, pull the dish from the oven immediately to prevent them from becoming stringy or tough.
Do I have to use white rice?
For this specific casserole method, yes, long-grain white rice is the most reliable choice. Other types of rice like basmati, jasmine, or brown rice have very different liquid and timing requirements. If you change the rice variety, you would have to adjust the amount of broth and the baking time significantly, which makes it much harder to get a consistent, non-mushy result.
What if my sauce is too thin?
If you find your teriyaki sauce is very runny, you can whisk in a teaspoon of cornstarch to the liquid mixture before pouring it over the rice. The cornstarch will help the sauce thicken into a glaze as it bubbles in the oven. Most store-bought teriyaki sauces already contain thickeners, so read your label first to see if it is necessary.
How do I know when the rice is done?
The rice is done when all the liquid has been absorbed and the grains are tender. You can test this by pulling back a small section of the chicken to look at the rice underneath. If it looks dry and the grains are fluffy, it is finished. If you still see a pool of liquid at the bottom, cover the dish and keep it in the oven for another five minutes.
Can I add extra vegetables?
Absolutely. Just be mindful of the total volume in your pan. If you add too many vegetables, the liquid-to-rice ratio will be thrown off. If you are adding more than one extra cup of vegetables, consider adding a quarter cup of extra broth to account for the evaporation that will occur. Keep the pieces similar in size so they cook uniformly.
Final Thoughts
Cooking this meal has made my weeknights much less stressful. It is a simple, no-fuss approach that gives me a hot, complete dinner without needing to watch the stove. The combination of savory teriyaki and fluffy rice is something I always look forward to after a long day.
I hope this becomes a regular in your rotation as well. It is easily adjustable to whatever vegetables you have on hand, and it always hits the spot when you want something satisfying. Enjoy the process of putting it together and the ease of serving a warm meal to your table.