
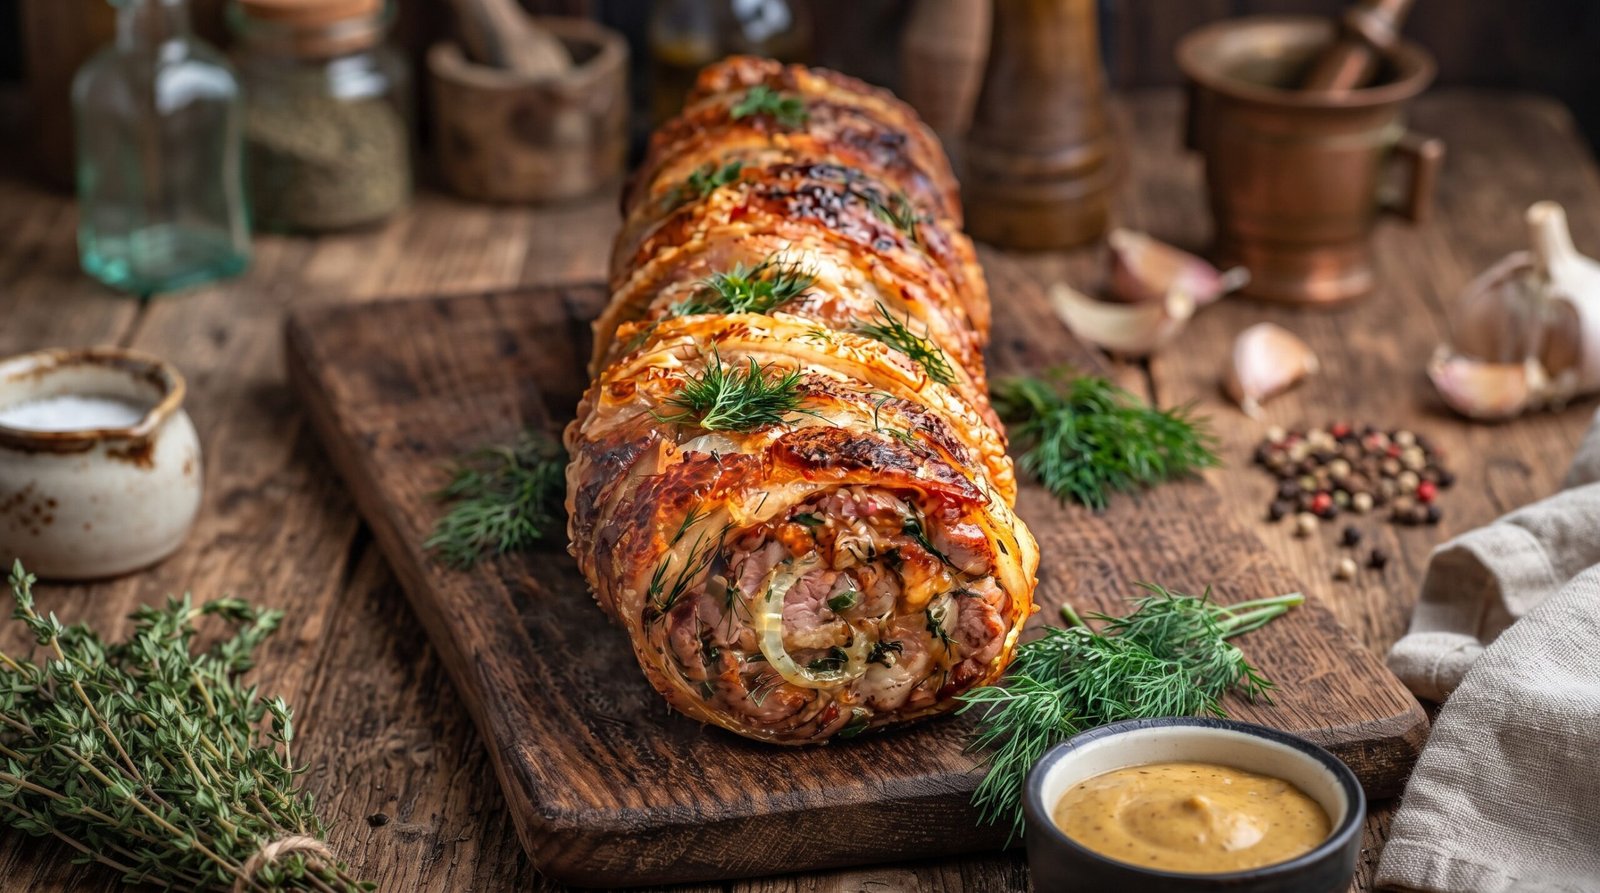
I remember the first time I stood in my kitchen staring at a large, flat slab of pork belly, feeling a bit intimidated by the idea of rolling it into a tight log. It felt like a daunting project for a busy Tuesday, but once I got the rhythm of rolling and tying, it became one of those recipes I return to whenever I want to make something that feels like a celebration. There is a quiet satisfaction in securing the kitchen twine around a piece of meat that has been seasoned with fragrant aromatics. The smell of rosemary and garlic as it roasts in the oven fills the house, signaling that something good is about to happen. This rolled porchetta roast requires a bit of focus during the prep phase, but the actual cooking is mostly hands-off, allowing you time to prepare some simple sides while the oven does the work. Whether you are hosting a small dinner or just looking to master a new skill, this recipe provides a centerpiece that feels special without needing complicated equipment.
Why This Recipe Works
This roast is a study in textures. By rolling the pork belly, you keep the interior moist and tender because the meat is essentially braising in its own rendered fat and the juices from the herbs. At the same time, the exterior skin, which we score carefully before rolling, works to shield the inside while developing a texture that is quite distinct. You get those bites where the outer layer provides a firm contrast to the succulent meat inside. The flavor profile is straightforward but effective. Using a blend of fresh herbs like rosemary and thyme, paired with garlic and a touch of lemon zest, keeps the richness of the pork from feeling too heavy. The herbs penetrate the meat as it cooks, seasoning every layer from the inside out.
The ease of this recipe comes from its reliance on simple heat and time. Once the roast is tied, you do not need to baste it or fuss with it. The shape of the roll ensures even cooking, provided you get the diameter relatively consistent. It is a forgiving dish, too. If you are a few minutes off on your timing, the fat content of the pork belly keeps it from drying out quickly. It is an honest meal that relies on quality ingredients rather than complex techniques. It scales well if you have more guests, and it happens to look quite impressive when you slice into it at the table. For a home cook, finding a recipe that tastes sophisticated but is fundamentally simple to execute is a win.
Ingredient Notes
The Pork
The foundation is a whole pork belly. You want to look for a piece that has a good balance of fat and meat. If you pick one that is entirely fat, it will be too greasy, and if it is too lean, it will lack the signature tenderness we want. Ensure the skin is still attached, as this is vital for the structure and the final texture. When buying, ask the butcher to trim the edges so it is a nice rectangle, which makes rolling significantly easier. If you cannot find a fresh belly, you can sometimes find them pre-cut at specialty meat counters. Always check the label to ensure it has not been pre-seasoned or brined, as you will want to control the salt levels yourself.
Aromatics and Seasonings
For the filling, fresh herbs are non-negotiable here. Dried herbs simply do not have the same brightness. I use a generous amount of rosemary and thyme, stripped from their stems. Garlic should be finely minced or pushed through a press so it distributes evenly across the interior. The lemon zest is a secret ingredient that cuts through the fat; it adds a citrus note that makes the pork feel lighter. Use kosher salt and freshly cracked black pepper. I prefer a slightly coarser grind for the pepper to give it a bit of texture against the meat. You can also add a pinch of fennel seeds, crushed slightly in a mortar and pestle, if you want that classic Italian flavor profile that works well with pork.
| Ingredient | Amount | Notes |
|---|---|---|
| Pork belly with skin | 3 to 4 pounds | Must have skin attached |
| Fresh rosemary | 1/2 cup | Leaves stripped and chopped |
| Fresh thyme | 1/4 cup | Leaves stripped |
| Garlic | 6 cloves | Minced finely |
| Lemon zest | 2 tablespoons | Freshly grated |
| Kosher salt | 2 tablespoons | Adjust to preference |
| Black pepper | 1 tablespoon | Freshly cracked |
| Kitchen twine | 1 roll | Natural cotton is best |
The Recipe
- Prep time: 30 minutes
- Cook time: 2 hours and 30 minutes
- Total time: 3 hours
- Servings: 6 to 8 people
- Difficulty: Intermediate
- Equipment: Kitchen twine, sharp knife, roasting pan, wire rack, meat thermometer
Step 1: Prep the Pork Surface
Start by laying your pork belly flat on a large cutting board with the skin side facing down. If the meat surface is uneven, you can use your knife to lightly butterfly any extra-thick parts so the whole piece has a uniform thickness. This ensures the roast cooks evenly. Take your knife and lightly score the skin side in a crosshatch pattern, being careful not to cut all the way through to the meat. This allows the fat to render properly during the long roasting process. Pat the meat side very dry with paper towels to ensure the seasonings stick well.
Step 2: Season the Interior
Combine the chopped rosemary, thyme, minced garlic, lemon zest, salt, and pepper in a small bowl. Rub this mixture thoroughly over the entire meat-side surface of the pork belly. Use your hands to press the herbs and garlic into the meat. Do not be shy with the seasoning; this is the only chance you have to flavor the inside of the roll. Once the surface is completely covered, let it sit for about 10 minutes so the flavors can begin to interact with the meat.
Step 3: Rolling and Tying
Starting from one of the long edges, roll the pork belly up into a tight log. The skin should now be on the outside. This can be a bit awkward the first time, so take your time to ensure the roll is as tight as possible. Once rolled, use your kitchen twine to secure the roast. Tie the twine at one-inch intervals along the length of the log. Make sure each knot is tight so the roast maintains its shape while cooking. Trim any excess twine with your scissors.
Step 4: The Initial Sear and Roast
Preheat your oven to 450 degrees Fahrenheit. Place the tied roast on a wire rack set inside a roasting pan. This allows the heat to circulate all the way around the meat. Put the pan in the oven and roast at this high heat for 20 minutes. This initial burst of heat helps to set the skin. After 20 minutes, lower the oven temperature to 325 degrees Fahrenheit and continue roasting for about 2 hours.
Step 5: Checking for Doneness
The roast is ready when the internal temperature, measured with a meat thermometer in the thickest part of the roll, reaches 160 degrees Fahrenheit. The skin should look blistered and golden. Remove the roast from the oven and transfer it to a cutting board. It is important to let the meat rest for at least 20 minutes before you even think about cutting into it. This allows the juices to redistribute through the meat, ensuring that every slice stays moist.
Step 6: Slicing and Serving
Once the rest period is over, remove the kitchen twine. Use a very sharp serrated knife to slice the roast into one-inch thick rounds. Because the skin can be firm, a sawing motion with a serrated blade works much better than a standard chef's knife. Arrange the slices on a platter and serve immediately. You will find that the interior is tender and aromatic, while the outer edge has a nice bite.
Mistakes I Made (So You Don't Have To)
Rolling Too Loose
My first attempt resulted in a loose roll that slumped in the oven, leading to uneven cooking. I learned that you have to use enough twine and pull each loop quite firmly. If the roll feels like it might uncoil as you tie it, use a second pair of hands or pin it with a few metal skewers before tying. A tight roll holds its shape and keeps the juices concentrated inside, which is the key to a good final texture.
Forgetting to Dry the Surface
One time, I was in a rush and forgot to pat the pork dry before applying the seasoning. The herbs slipped right off, and the skin did not crisp up as well as I wanted. Moisture is the enemy of a nice exterior finish. Now, I always take an extra minute to ensure the surface is completely dry with paper towels before I start rubbing in the herbs and salt. It makes a significant difference in how the skin develops.
Slicing Too Soon
I have definitely been guilty of impatience and slicing into the meat immediately after pulling it from the oven. The result was a mess of juices running all over the cutting board and meat that felt slightly drier than it should have been. The 20-minute rest is non-negotiable. It is the hardest part of the process, but waiting allows the internal juices to settle back into the muscle fibers, making the meat much more succulent and easier to slice thinly.
Over-Salting the Interior
I once used a bit too much salt in the rub, which made the center of the roast overly aggressive. Since the meat is rolled up, the flavors get trapped, and a little salt goes a long way. I now stick to a measured two tablespoons of kosher salt. It is better to have a bit of salt on the table for guests to add if they wish than to have the entire roast feel salty from the first bite.
Variations and Tips
Adding Fennel for Flavor
If you enjoy a more classic Italian style, add two tablespoons of toasted, crushed fennel seeds to your herb rub. The anise-like flavor of the fennel pairs beautifully with the richness of the pork. Just dry-toast the seeds in a pan over medium heat for two minutes until they are fragrant, then crush them with a mortar and pestle before mixing them with your rosemary and garlic.
Using an Air Fryer
If you are cooking for a smaller crowd, you can use a smaller piece of pork belly and roast it in an air fryer. Preheat your air fryer to 400 degrees Fahrenheit, place the rolled and tied pork inside, and cook for 20 minutes. Then, lower the heat to 300 degrees Fahrenheit and cook for another hour or until the internal temperature reaches 160 degrees Fahrenheit. This is a great way to save energy and time if your roast fits the basket.
The Make-Ahead Strategy
You can prepare the roast entirely through the tying stage up to 24 hours in advance. Once it is tied, wrap it tightly in plastic wrap and store it in the refrigerator. Take it out of the fridge about 45 minutes before you plan to put it in the oven so it can come closer to room temperature. This helps it cook more evenly and saves you time on the day you plan to serve the meal.
Consistent Sizing
When buying your pork belly, try to select a piece that is relatively rectangular. If the piece is uneven, you will end up with a roast that is thin on one end and thick on the other, meaning one part will overcook while the other might still be struggling. If your butcher offers, ask them to square it off for you. If you are doing it yourself at home, trim the irregular, thin edges and save them for a stir-fry later in the week.
Storage and Reheating
If you have leftovers, they should be refrigerated within two hours of cooking. Place the slices in an airtight container. The meat will stay good for up to three days in the refrigerator. I do not recommend freezing this dish once it is cooked, as the texture of the pork belly fat changes significantly upon thawing and reheating, often becoming grainy or overly soft. It is best enjoyed fresh or within those three days.
To reheat, you want to bring the meat back to a safe internal temperature of 165 degrees Fahrenheit. The best way is to place the slices in a baking dish with a tiny splash of water or broth to keep them from drying out, cover the dish tightly with foil, and heat it in a 325-degree oven for about 15 minutes. You can also use a skillet on medium-low heat. Add the slices and a teaspoon of water, cover with a lid, and warm until steaming hot. Avoid using the microwave if possible, as it tends to make the fat rubbery.
Frequently Asked Questions
Can I use a different cut of pork?
You really need the pork belly for this specific recipe because of its high fat content and skin. Other cuts like pork loin are much leaner and will dry out if roasted for this length of time. If you cannot find pork belly, look for a piece of pork shoulder, though the shape and texture will be different. The belly is ideal because the fat bastes the meat from the inside as it renders.
Why does the recipe call for a wire rack?
The wire rack is essential for air circulation. If the pork sits directly on the bottom of the roasting pan, the juices that render out will pool around the bottom of the roast, effectively braising it rather than roasting it. Using a rack ensures that the heat hits all sides of the pork evenly, helping you get a better texture all around and preventing the bottom from becoming soggy.
What if I do not have a meat thermometer?
I strongly advise using one. It is the only way to be certain the meat is safely cooked to 160 degrees Fahrenheit. Without it, you are guessing, and because pork belly varies in thickness, visual cues like time or color are often misleading. A digital thermometer is a very small investment that prevents overcooking or undercooking your centerpiece roast.
Is it necessary to remove the twine before slicing?
Yes, it is safer and cleaner to remove the twine before you start slicing. You should be able to snip the knots and pull the strings out easily after the meat has rested. Trying to slice through the twine will just get tangled in your knife and make for an uneven presentation. Take an extra minute to remove all the pieces of string before you begin carving.
Can I add vegetables to the pan?
You certainly can. About 45 minutes before the pork is done, you can toss chopped potatoes, carrots, or root vegetables into the bottom of the roasting pan. They will cook in the rendered pork fat that drips down from the rack. This makes for an excellent one-pan meal that absorbs all the savory flavors of the herbs and the meat juices.
Final Thoughts
Making a rolled porchetta roast is one of those projects that connects you to the act of cooking. It is a process that requires patience, from the initial seasoning to the careful tying, and finally, the wait while it roasts. When you pull it out of the oven, the smell alone is enough to tell you that the effort was worth it.
I hope you enjoy the process as much as the meal itself. It is a straightforward dish that lets the quality of the meat and the brightness of the fresh herbs shine. Serve it simply with some roasted vegetables or a crisp salad, and you have a meal that is both satisfying and memorable.